This lesson is an ideal way to incorporate art making and slow looking into the process of students getting to know one another at the beginning of the year. It is an activity I’ve seen used in therapeutic settings as well because it encourages self-reflection and a positive, imagined future self. It could also be modified to connect to a language arts lesson that seeks to build comprehension of symbols and symbolism or even to curriculum relating to archaeology and/or pre-literary human history.
Objectives:
Students will look at artworks that contain the human hand and discuss its use as a symbol.
Students will consider the way they express themselves in the world and imagine ways that they would like to express themselves in the future.
Students will find their own symbolic “language” to depict these qualities in their artwork.
Students will reflect on the making process, their composition, what pleases them about it, what they would change, or what was challenging.
Students will get to know one another through sharing their work and its meaning.
Materials:
- Paper large enough to accommodate two hands
- Ultra-fine and/or fine tip markers (black and an assortment of colors)
- Pencils and erasers
Steps:
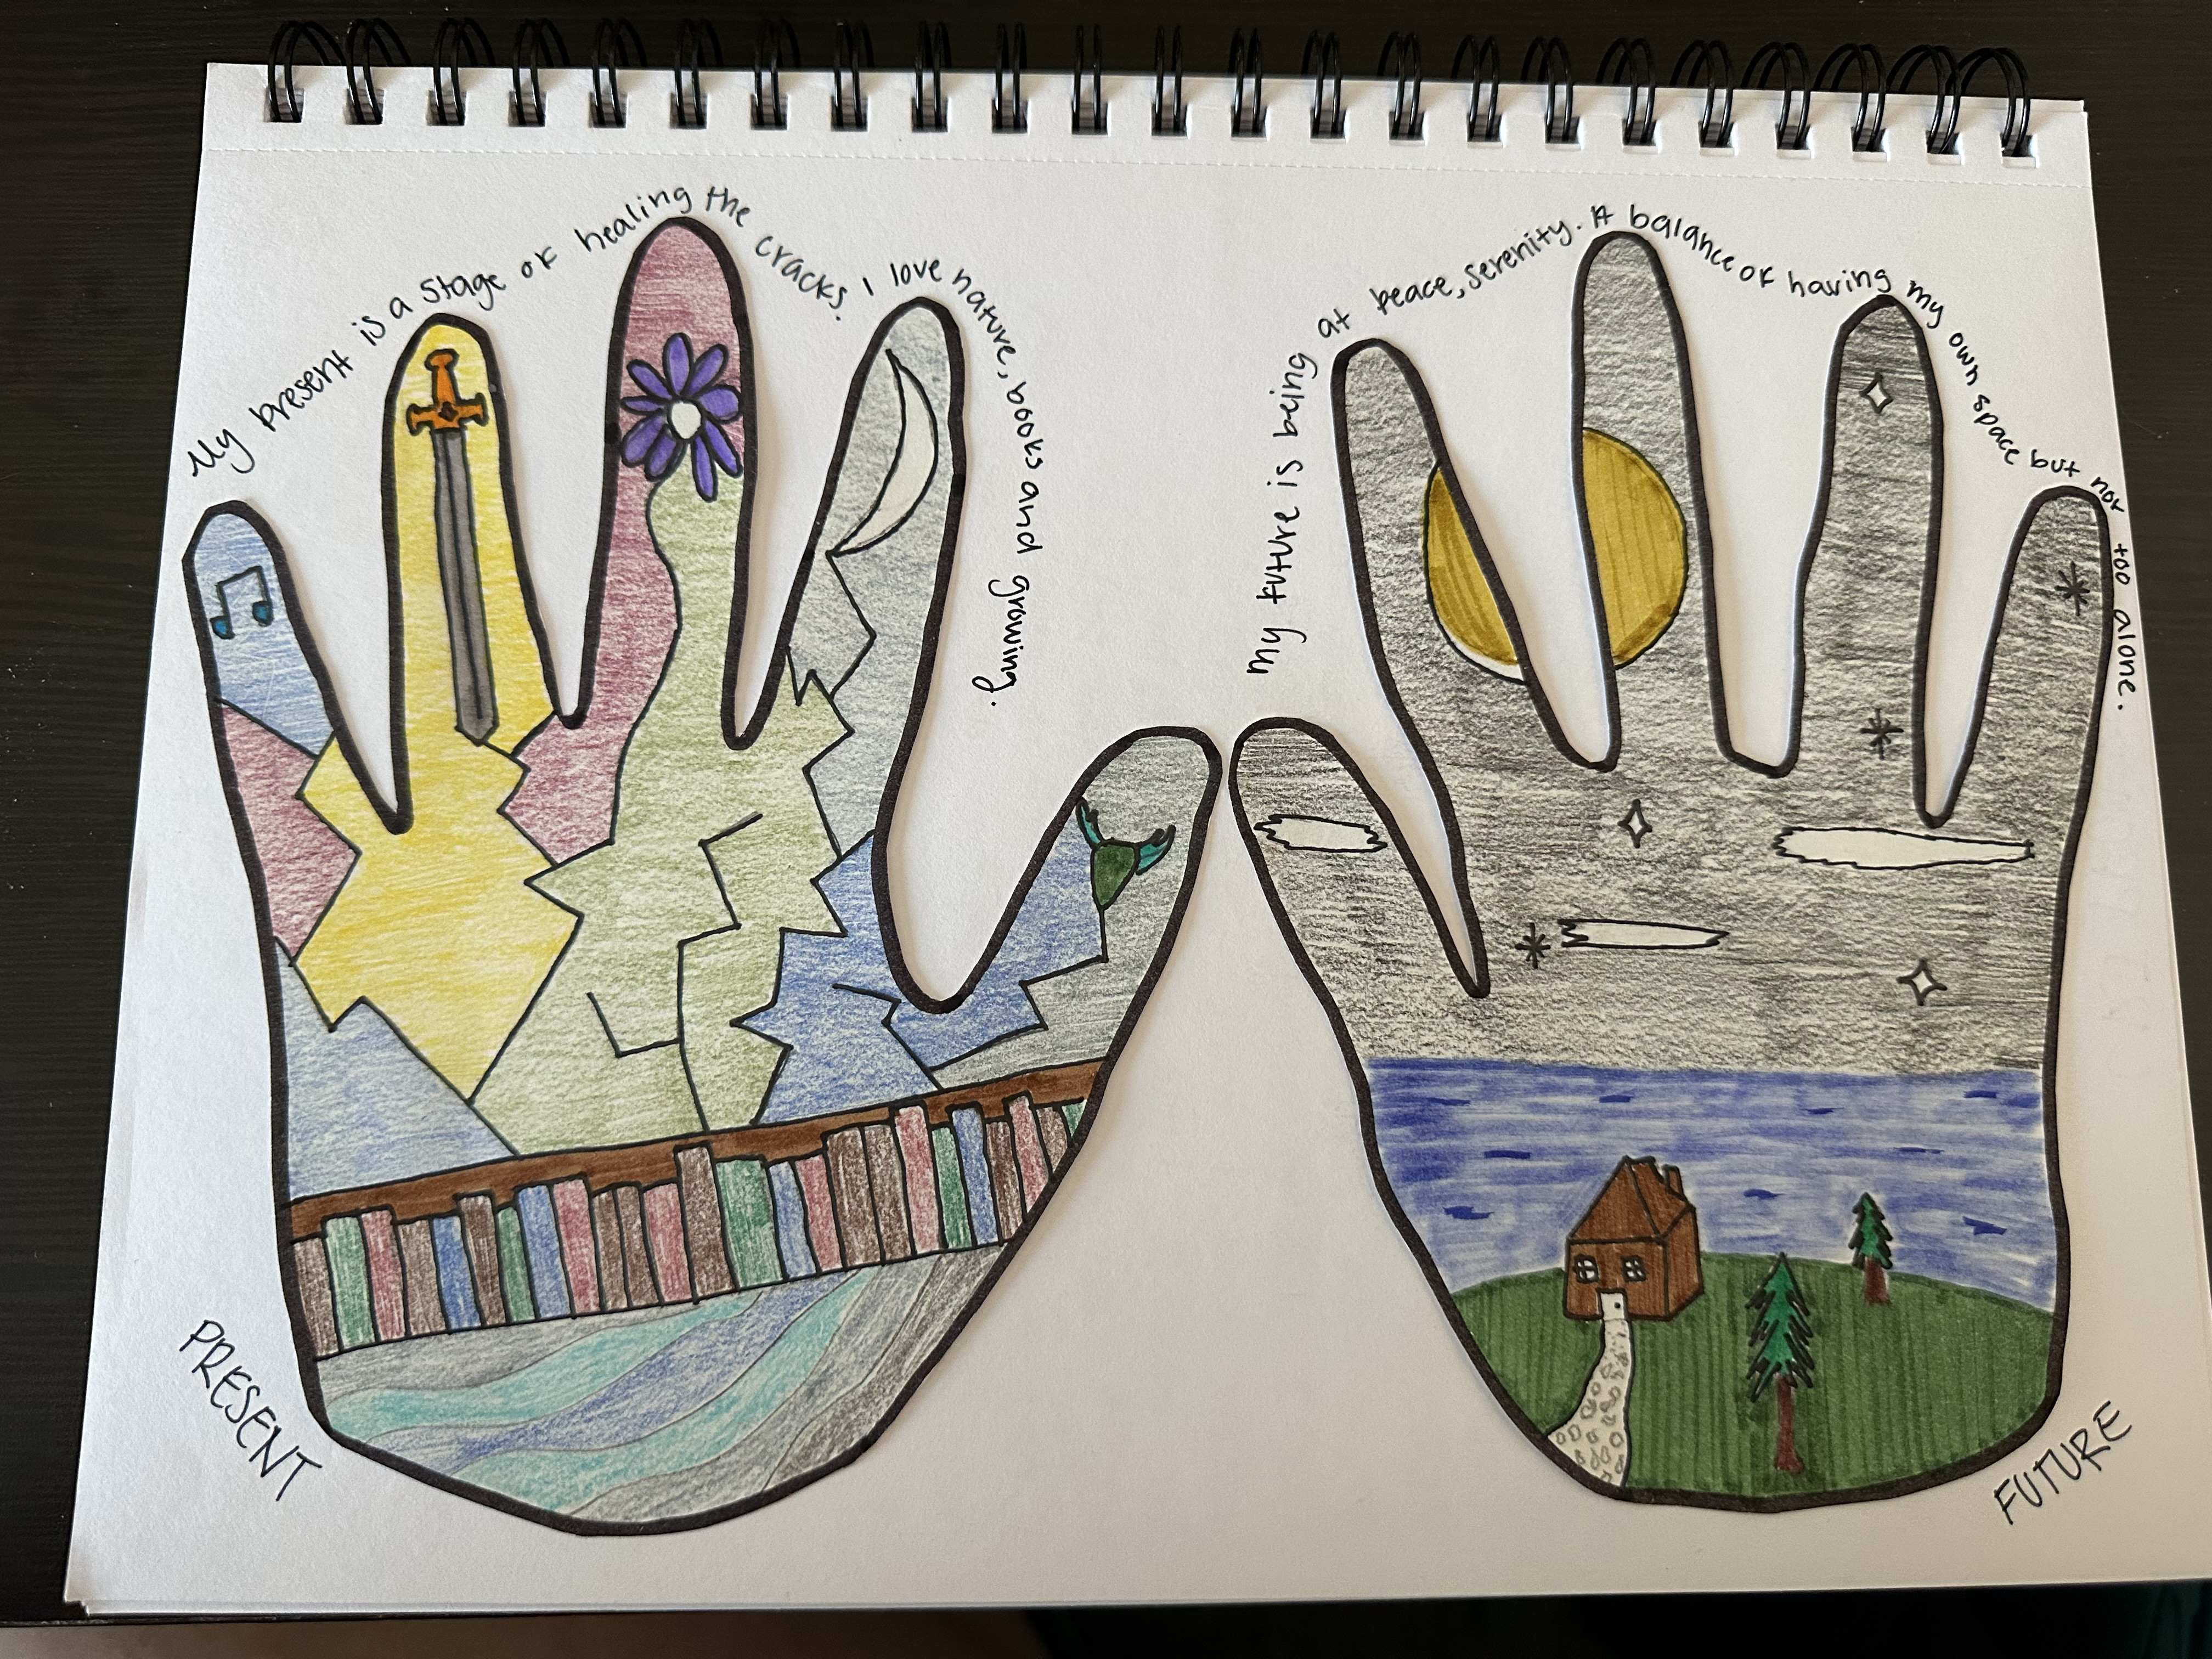
1. Look at an artwork that features the human hand as a symbol (For example, a photograph of Cave of the Hands). Begin with what students notice (colors, composition, location, guesses about meaning, etc.). Move toward a conversation about the hand as a symbol. Some example questions: What are some different ways we use our hands? How has the hand been used as a symbol? What are some examples that you can think of? What does the hand mean to you?
2. Introduce the handprint activity and show students a demo. Discuss composition and various choices made- abstract vs figurative, color, choice of personal symbols, etc.
3. Have students begin by brainstorming a list of words, qualities, ideas about themselves in the present tense. How are they “known” to others and to themselves? What qualities do they possess?
3. Have students begin by brainstorming a list of words, qualities, ideas about themselves in the present tense. How are they “known” to others and to themselves? What qualities do they possess?
4. Next, have students make a list of qualities they would like to discover and develop in themselves. How will their future self be known? When they make their lists, encourage students to begin thinking of images, symbols, colors, or shapes that could represent these various qualities.
5. Have students trace their right and left hands (and potentially wrist and forearms) onto their paper in pencil. Have them pair up to help trace their dominant hands. Consider composition here too. The hands could be side by side, fingertips face to face, one right side up, one upside down, etc.
6. Once they are satisfied with their tracing, have students outline the hands in black ink.
7. Remind them of any compositional tricks and tips and then let them explore adding their designs. With younger students, encourage the use of pencil first. With older students, it is a choice whether they use pencil first or jump in with sharpie. Notice who does what!
8. As students finish, or at a designated time, have them reflect on their process- what worked, what did they like, what didn’t work, what would they change, etc.
9. Have students share the meaning behind their hands either with the whole group, or in smaller groups if it’s necessary for time management.