Memory maps can connect students to maps in general, their various uses throughout human history, and illustrative map making traditions. It also gets them thinking about way-finding on a very personal level and as an element of story telling and memory. You can facilitate a memory to map together- taking a walk as a group for example- or they can work with a memory all their own. Students could map their neighborhoods, their walk to school or a local park, another special place from their experience, or even their homes and yards. Because it engages memory and is evocative of personal narrative and mythologies, this is also a wonderful activity for adults.
Objectives:
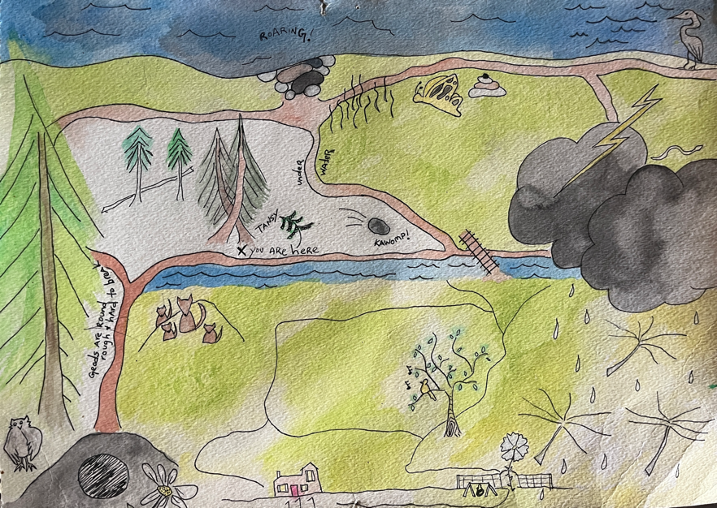
Students will view some illustrative maps and discuss the map makers’ choices about scale, representation, and perspective.
Students will reflect on important remembered places from their lives and choose one to represent with a memory map.
Students will reflect on important remembered places from their lives and choose one to represent with a memory map.
Students will represent their remembered place and its details through a combination of symbol, illustration, and perspective.
Students will share their work and discuss the content of their memory maps and the choices they made in the process of making it.
Materials:
- Watercolor paper (or journal)
- Pencil
- Fine tip black sharpie
- Watercolor paints
- Paintbrush
Steps:
1. Look at some examples of illustrative maps and discuss the map makers’ choices regarding perspective, scale, and representation.
1. Look at some examples of illustrative maps and discuss the map makers’ choices regarding perspective, scale, and representation.
2. Show students some ink and watercolor examples.
3. Have students consider a remembered space that they would like to represent. It can be from their current experience or their past. Discuss some examples. As an alternative, take students on a walk and have them mentally record observations, conversations, etc.
4. Once they’ve made their memory choice, have students draw a small sketch in order to visualize the scale and location of various details.
5. Discuss the steps of making: pencil first, then sharpie over the pencil, and then watercolor.
6. Once students have completed their maps, have them get into groups and share details from their memory, why they chose to represent it the way they did, challenges encountered, successes, etc.
Resources:
How to Make an Illustrated Map in 8 Steps
https://www.nytimes.com/2020/04/26/travel/how-to-make-an-illustrated-map-in-8-steps.html
Navigating HiStory: Storytelling and the Illustrated Map
Navigating HiStory: Storytelling and the Illustrated Map