SPLIT-PIN PUPPET
TOOLS: scissors, pencil, split-pins
ASSEMBLY:
Download and print the image onto a full A4 sheet of paper.
Color-in and/or decorate your puppet pieces.
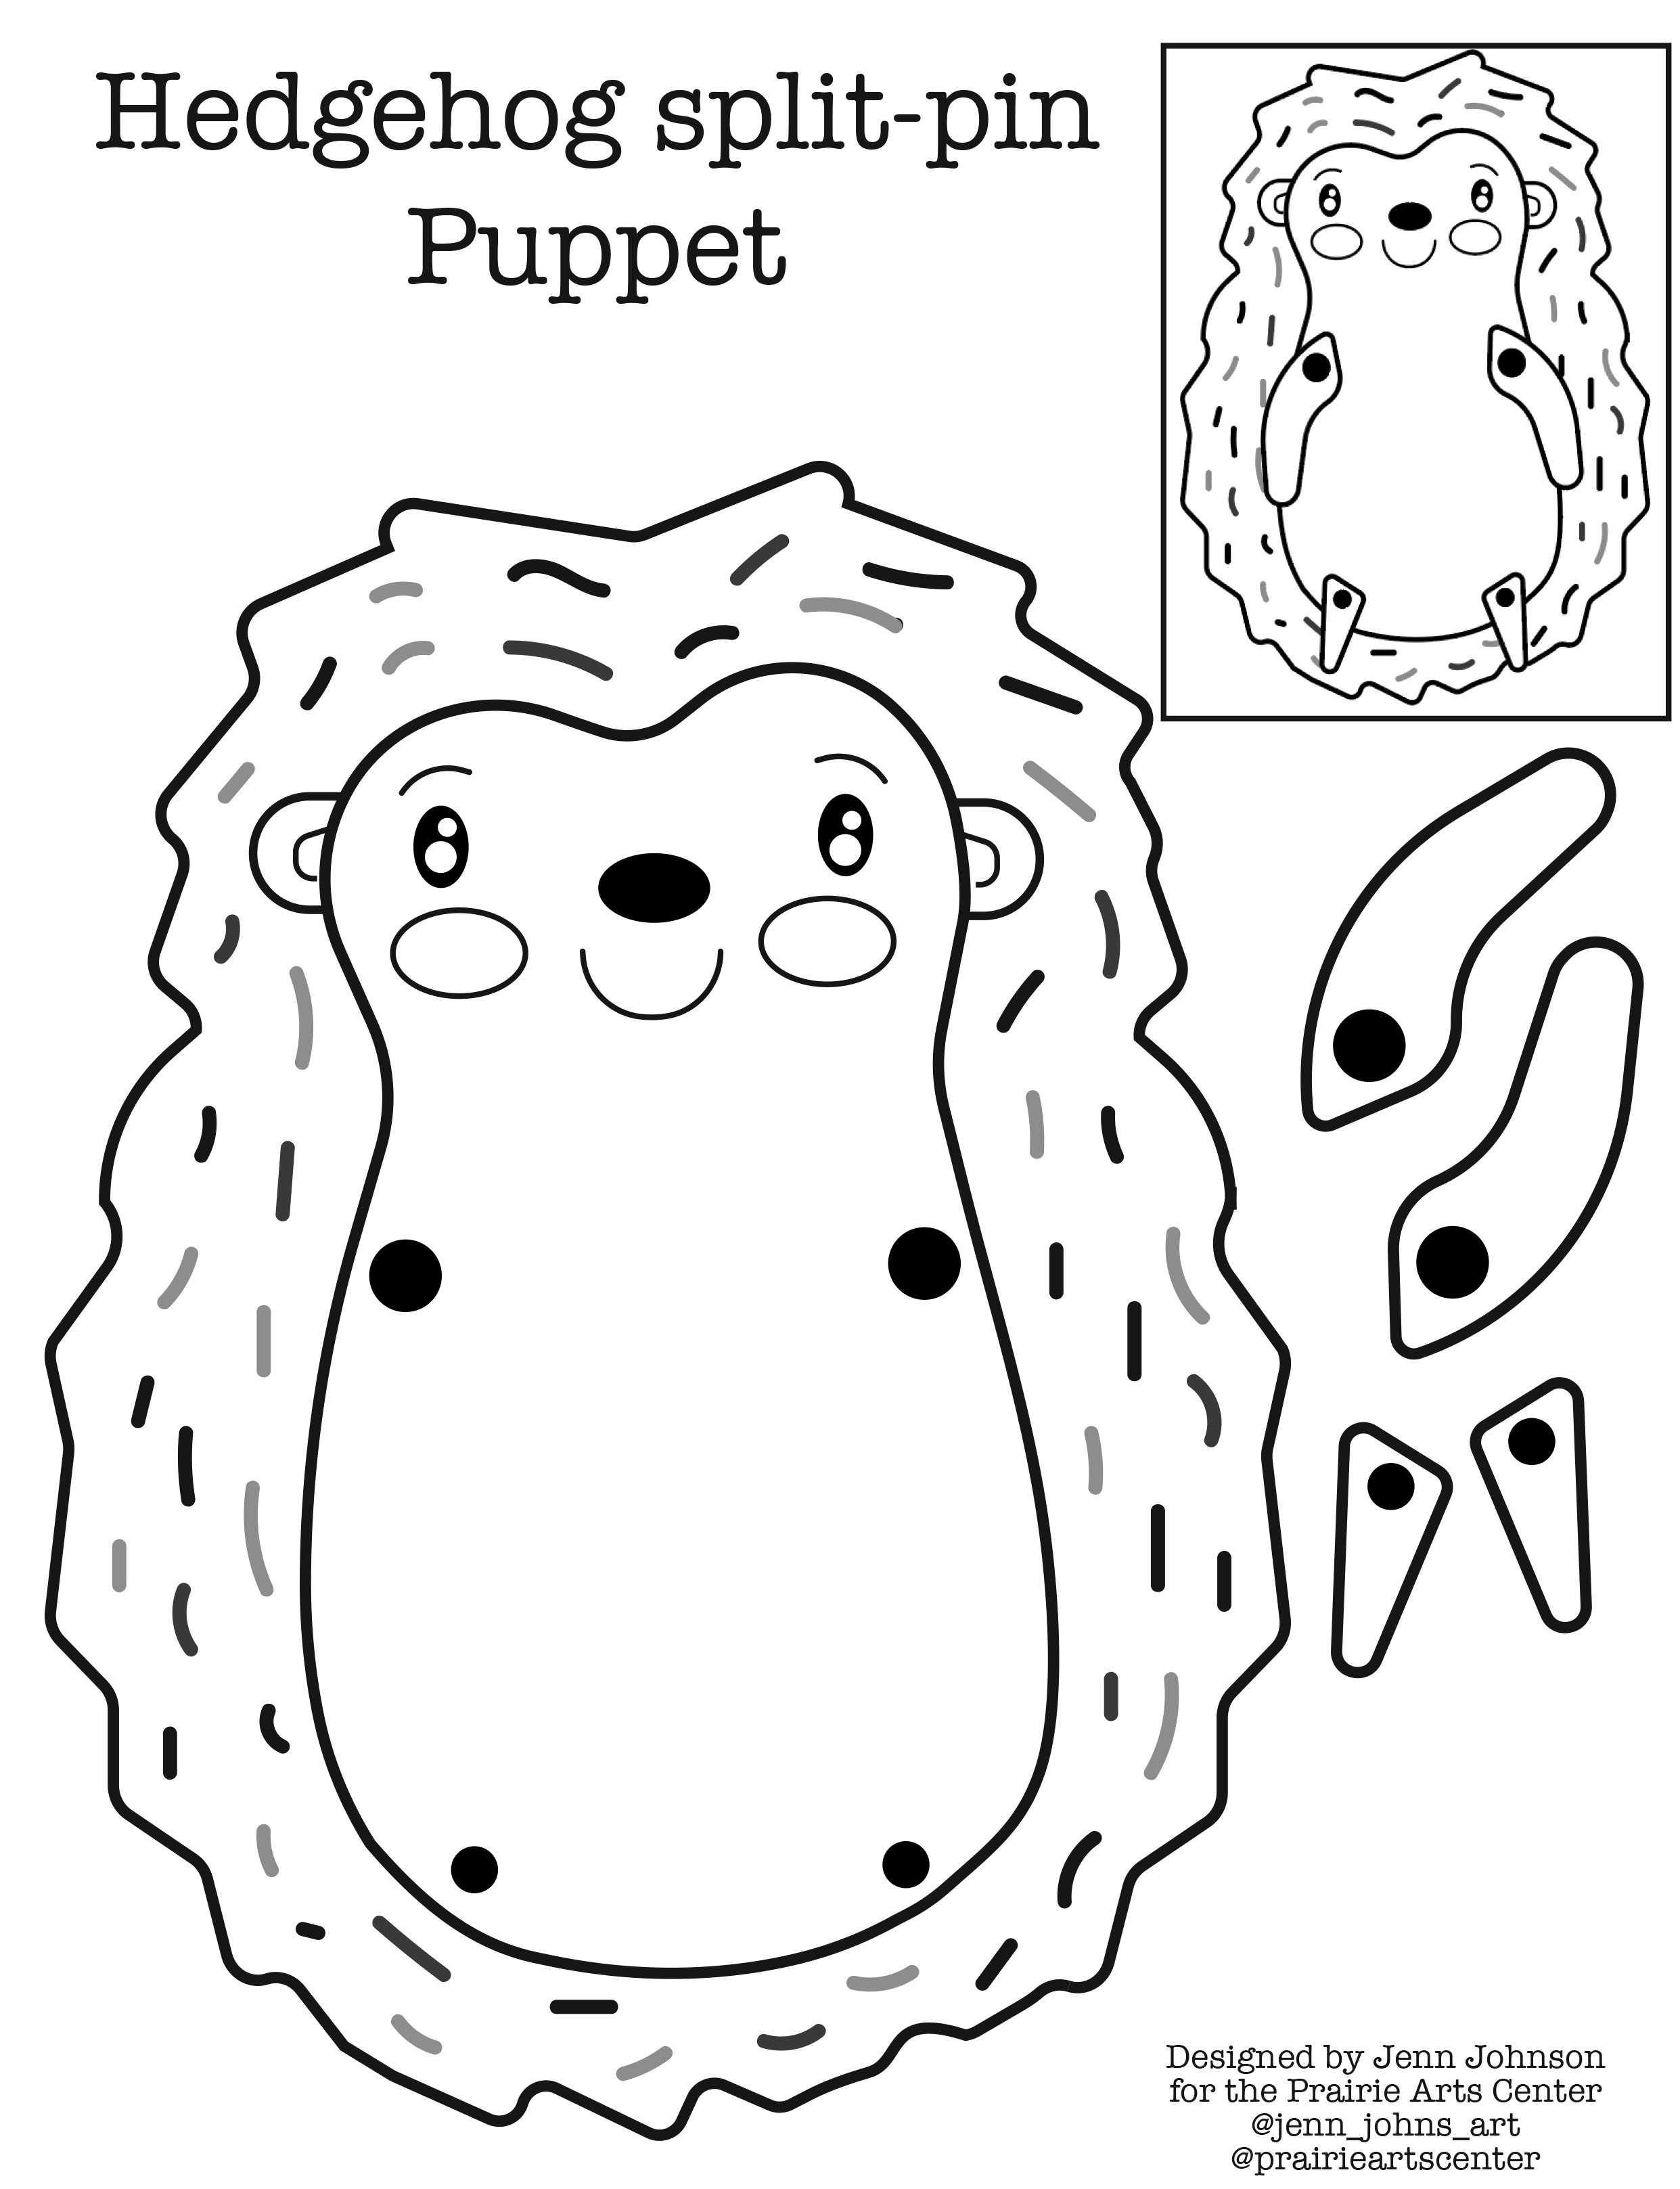
Once finished, cut out pieces and make holes for the split pins (paper fasteners) to go through with a pencil. The black dots on the puppet pieces illustrate where the pins should go.
Construct your puppet using split pins to join the pieces together. A finished image of the puppet is included in the upper right corner as a guide for assembly.
Now your puppet is complete and ready to play with!
The template can also be used for fabric dolls:
STUFFED FABRIC DOLL
To create, trace each puppet piece onto fabric and cut out 2 fabric pieces for each part. (Alternatively, trace design onto tracing paper, cut out parts, and pin to fabric. Cut out 2 of each piece using tracing paper as a guide.)
For facial features, cut out separate pieces for each feature; add before stuffing body.
Sew each pairing part together on three sides, leaving an opening to add stuffing.
Once your puppet is stuffed, finish sewing parts shut, and then stitch each piece onto the body
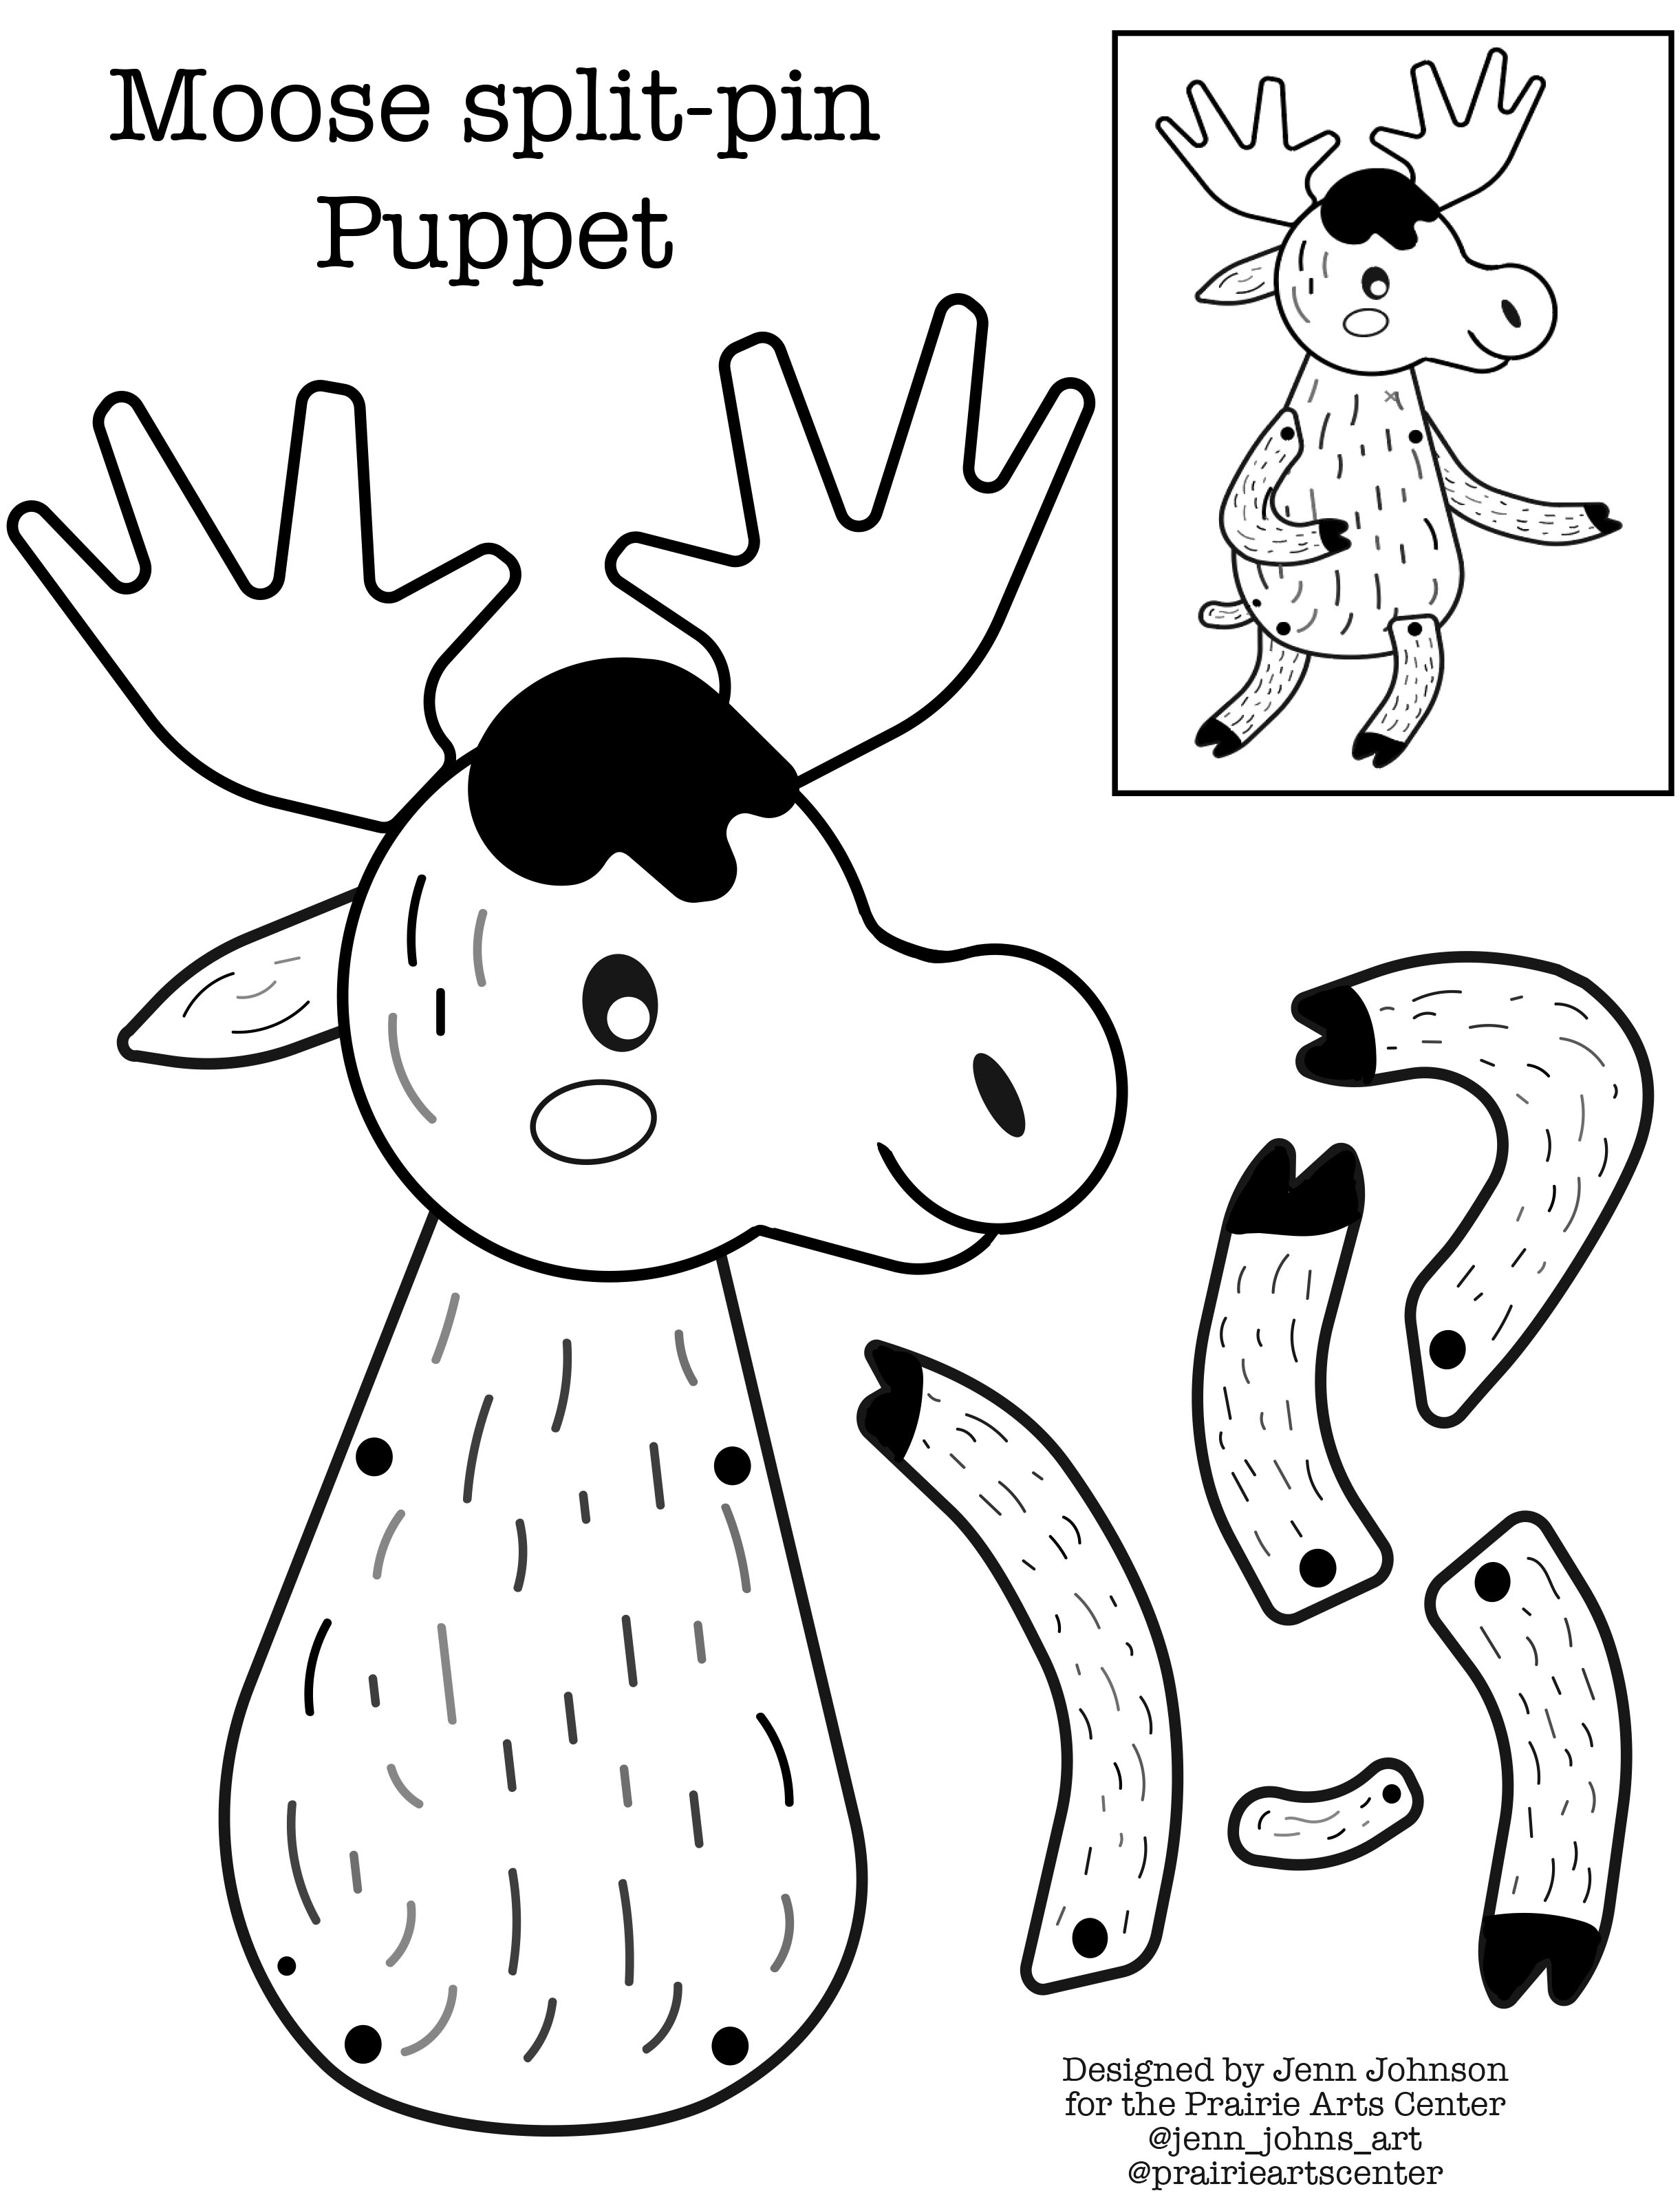
Moose Split-Pin Puppet Download
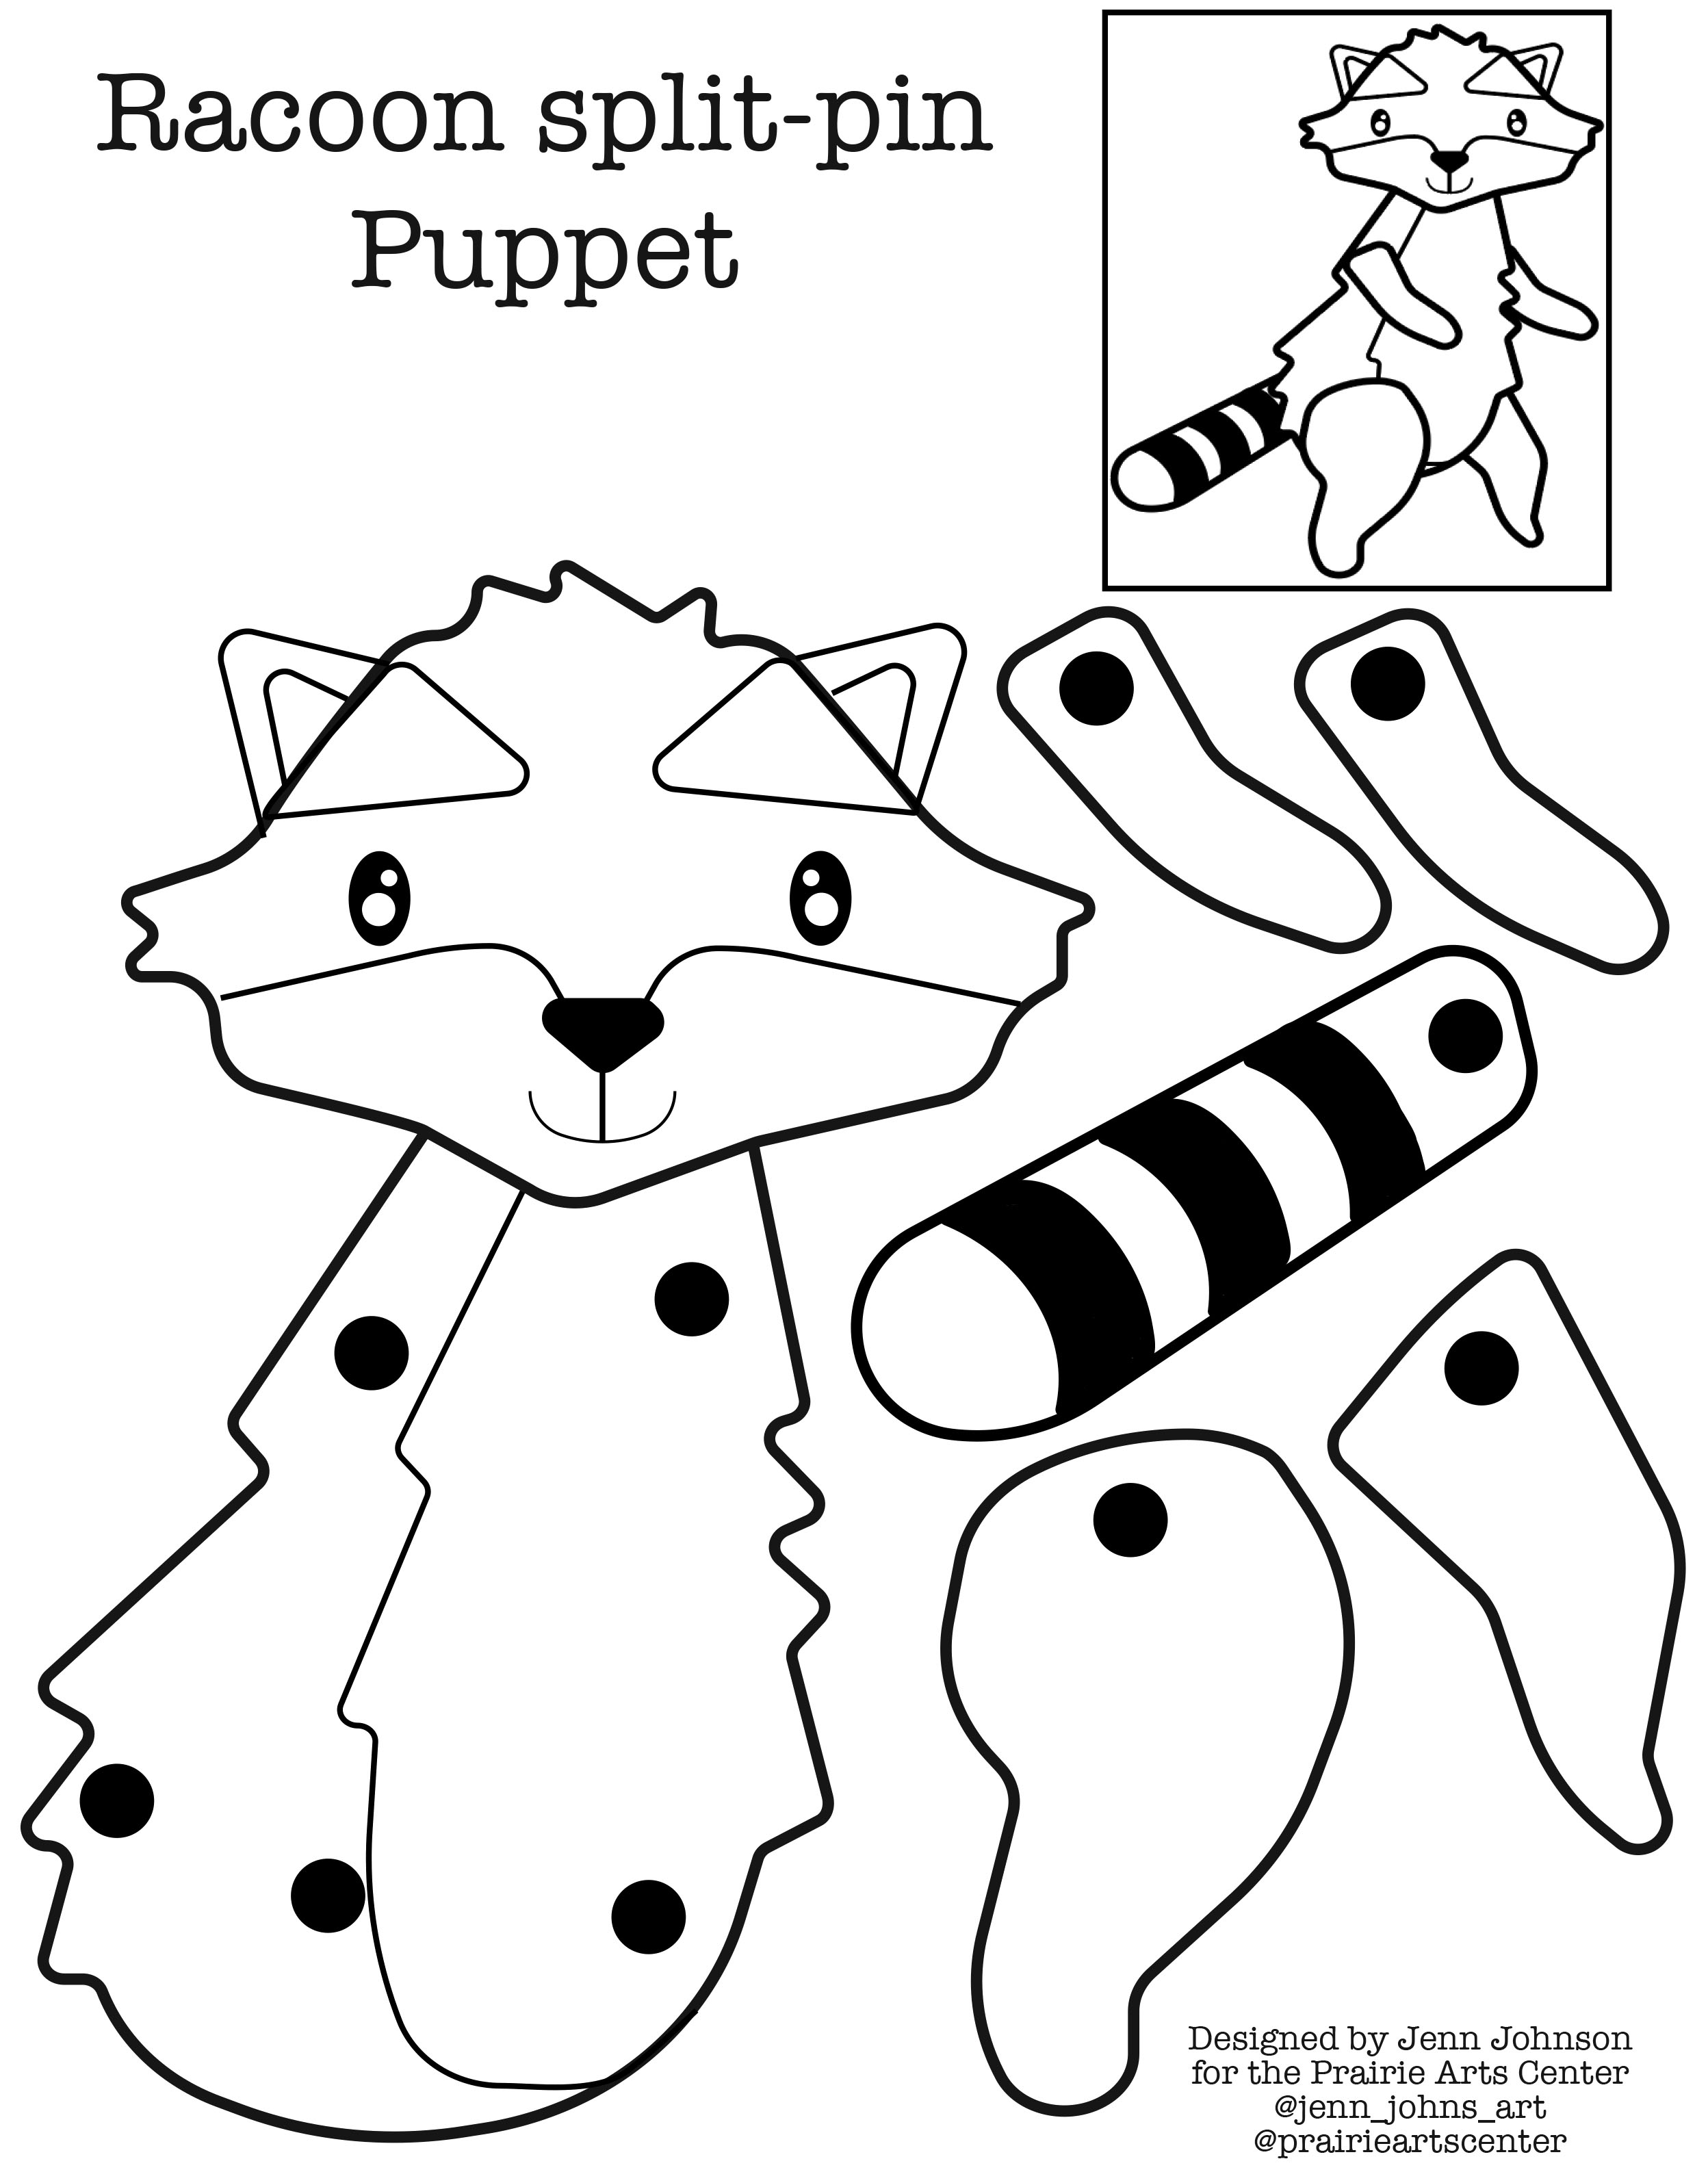
Racoon Split-Pin Puppet Download